Server protection beyond WordPress
My earlier article covered protecting WordPress against brute-force attempts. This follow-up looks at Fail2ban, which monitors matching log activity and can apply firewall bans.
The original lab used Ubuntu 16.04 LTS in August 2017. Treat that version and the screenshots as historical context. Log locations, service defaults, firewall actions, and plugin files vary across newer installations.
What kind of hosting do you have?
A virtual private server, or VPS, is a virtual server running on a physical host. A dedicated server provides an entire physical machine. Shared hosting usually gives you fewer system permissions, so installing and configuring Fail2ban may be the hosting provider’s responsibility.
Connect to your server
Use SSH or your provider’s management console. Windows users may use an SSH client such as PuTTY, while many systems also include an SSH command. Get any client from its official publisher.
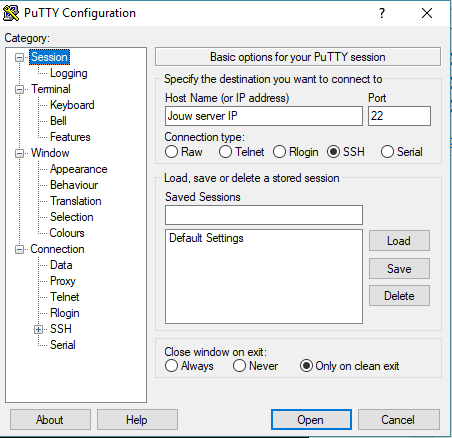
Before changing firewall-related controls, make sure you have an alternative console or other recovery access. Keep your existing SSH session open while testing.
Install the package
On an appropriate Ubuntu installation, refresh package information and install Fail2ban with administrative permissions:
sudo apt-get update
sudo apt-get install fail2ban
Review system upgrades separately so you understand their impact on a running server. There is no need to stay in a root shell for the entire configuration process.
What a jail does
A jail combines a filter, a log source, thresholds, and an action. The action determines which traffic gets blocked. It doesn’t necessarily block every service on the server.
The original example used these default values:
[DEFAULT]
ignoreip = 127.0.0.1/8 ::1
bantime = 3600
findtime = 600
maxretry = 3
Here, three matching failures within ten minutes can trigger a one-hour ban for jails using those defaults. The loopback entries are trusted addresses. The original text confused 127.0.0.1 with 172.0.0.1; those are different addresses.
Place deliberate overrides in a local configuration file, rather than editing the package’s main defaults. Check the upstream configuration comments and your installed version. Don’t assume the SSH jail is active without checking.
Connecting WordPress events
The original test used the WP fail2ban plugin to log WordPress security events, then configured a matching server-side filter and jail. Installing the WordPress plugin alone isn’t the same as installing the server service.
The historical jail looked like this:
[wordpress-hard]
enabled = true
filter = wordpress-hard
logpath = /var/log/auth.log
maxretry = 3
port = http,https
ignoreip = 127.0.0.1/8 ::1
findtime = 172800
bantime = 604800
This example watches a specific log path and applies a much longer observation window and ban. It only makes sense if that file actually receives the events your installed filter recognizes. Follow the plugin’s installation instructions for filter locations and logging setup, rather than assuming the paths from the 2017 version still apply.
Validate before relying on it
Check configuration syntax, confirm that the intended events reach the log source, then restart or reload the service as appropriate for your system. Inspect the jail status with:
sudo fail2ban-client status wordpress-hard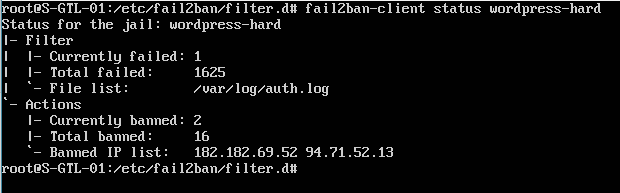
An active jail isn’t proof that failures are being matched correctly. Test carefully from a controlled address, verify the resulting action, and confirm how to remove a mistaken ban. Similar principles can apply to other services when suitable filters and logs are available.